Every year, thousands of house fires are caused by poor electrical wiring. In some of these cases, the culprit is actually a bad or broken outlet, which is why it’s so important to periodically check yours. Determining if an outlet needs replacing is easy.
First, look for visual clues: if the face of the outlet looks burned or has scorch marks, it’s probably time to change it. Sometimes, there are no visual clues, but rather, the outlet is unable to hold a plug snugly, it sparks, or the lamp flickers. Of course, sometimes it simply won’t work. Any of these is an indication that the outlet needs replacing. Changing an outlet is not difficult, but it’s imperative that you follow certain steps to remain safe.
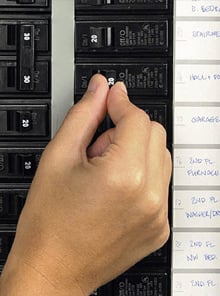
- Shut off the power to the circuit—you can do this by locating the circuit breaker in the circuit box. It’s a good idea to place a piece of tape labeled “Do Not Touch” over the circuit box to insure that no one else will flip the circuit back on.
- Remove the cover plate and test the power: Once you remove the cover plate, you will need to test the power with a circuit tester to be certain that power is indeed off. (You can also leave a lamp or radio plugged in.) If the tester indicates that the power is off, then continue to step 3. If the power is still on, do not continue.

- Unscrew the electrical outlet and pull it forward from the electrical box to expose the wiring: Do not cut the wires. Pull it forward with the wires still attached. You may want to check the power one more time with the circuit tester.
- After the outlet is removed, you can remove the wires. But do not cut your wires if the leads extend less than 3 inches beyond wall box.
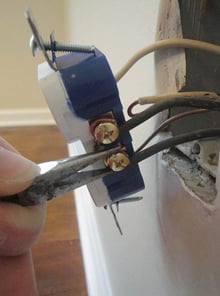
- If the wires are salvageable, that is, not frayed or scorched, you can unscrew the wires and remove the damaged outlet. It’s imperative to remove the wires in the following order:
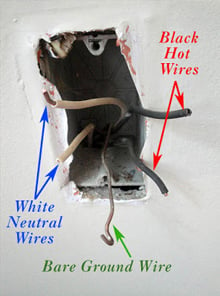
Black: (this is the “hot” wire). Loosen the screw by turning it counter-clockwise. Repeat the step with the white (neutral) wire, then finally remove the green (ground) wire.
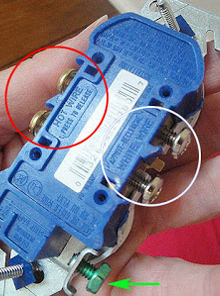
- Attach the new outlet. Here, it’s important to know which wires connect to which screw:
Black wire: insert it in the hole with the brass screw
White wire: insert it in the hole with the silver screw
Green wire: insert it in the hole with the green screw
Electricians have a little saying that goes like this: “Black to brass and green to ground.” - Before installing the new outlet, be sure to wrap the wires with electrical tape to prevent it from sparking. Now, you are ready to install and test. Gently tuck the wires back into the outlet box—be sure to install the box with the neutral side up to insure that if anything were to fall onto the outlet it would hit the neutral side and prevent arching. Now, screw it into place and cover with the face plate.
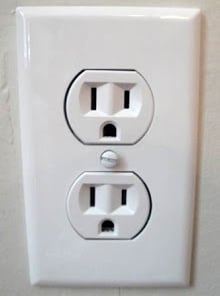
- You are now ready to turn the power back on at the circuit box. Test the outlet one last time by pushing the “test button” in the middle of the receptacle. If the reset button pops out, your outlet is live and working.
Because outlets deteriorate from time or from constant use, it’s always a good idea to check the outlets in your home to insure they are running properly semi-annually. If you have any doubts or fears about changing the outlet, do not hesitate to call a licensed electrician, as this kind of work can be dangerous.
 201 366 8692

